
Dyeing Easter eggs is a classic springtime tradition that brings out creativity in kids and adults alike. While store‑bought kits with bright synthetic dyes are fun, they often come with awkward plastic trays and limited color options. This year, try something fresh and eco‑friendly by creating natural Easter egg dyes using ingredients from your kitchen or pantry.
Not only is natural dyeing inexpensive, but it also connects kids to nature and introduces them to simple, hands‑on science. You may already have everything you need on hand, and in just a few steps, your eggs will be filled with earthy tones and vibrant hues, without artificial dyes.

Why Try Natural Dyeing for Easter Eggs?
Natural dyes are:
- Kid‑friendly and less messy
- Non‑toxic and made from everyday foods
- Eco‑friendly and fun to experiment with
- Perfect for seasonal activities and learning
Plus, creating your dyes lets kids see how different ingredients release color, making the activity both artistic and educational.
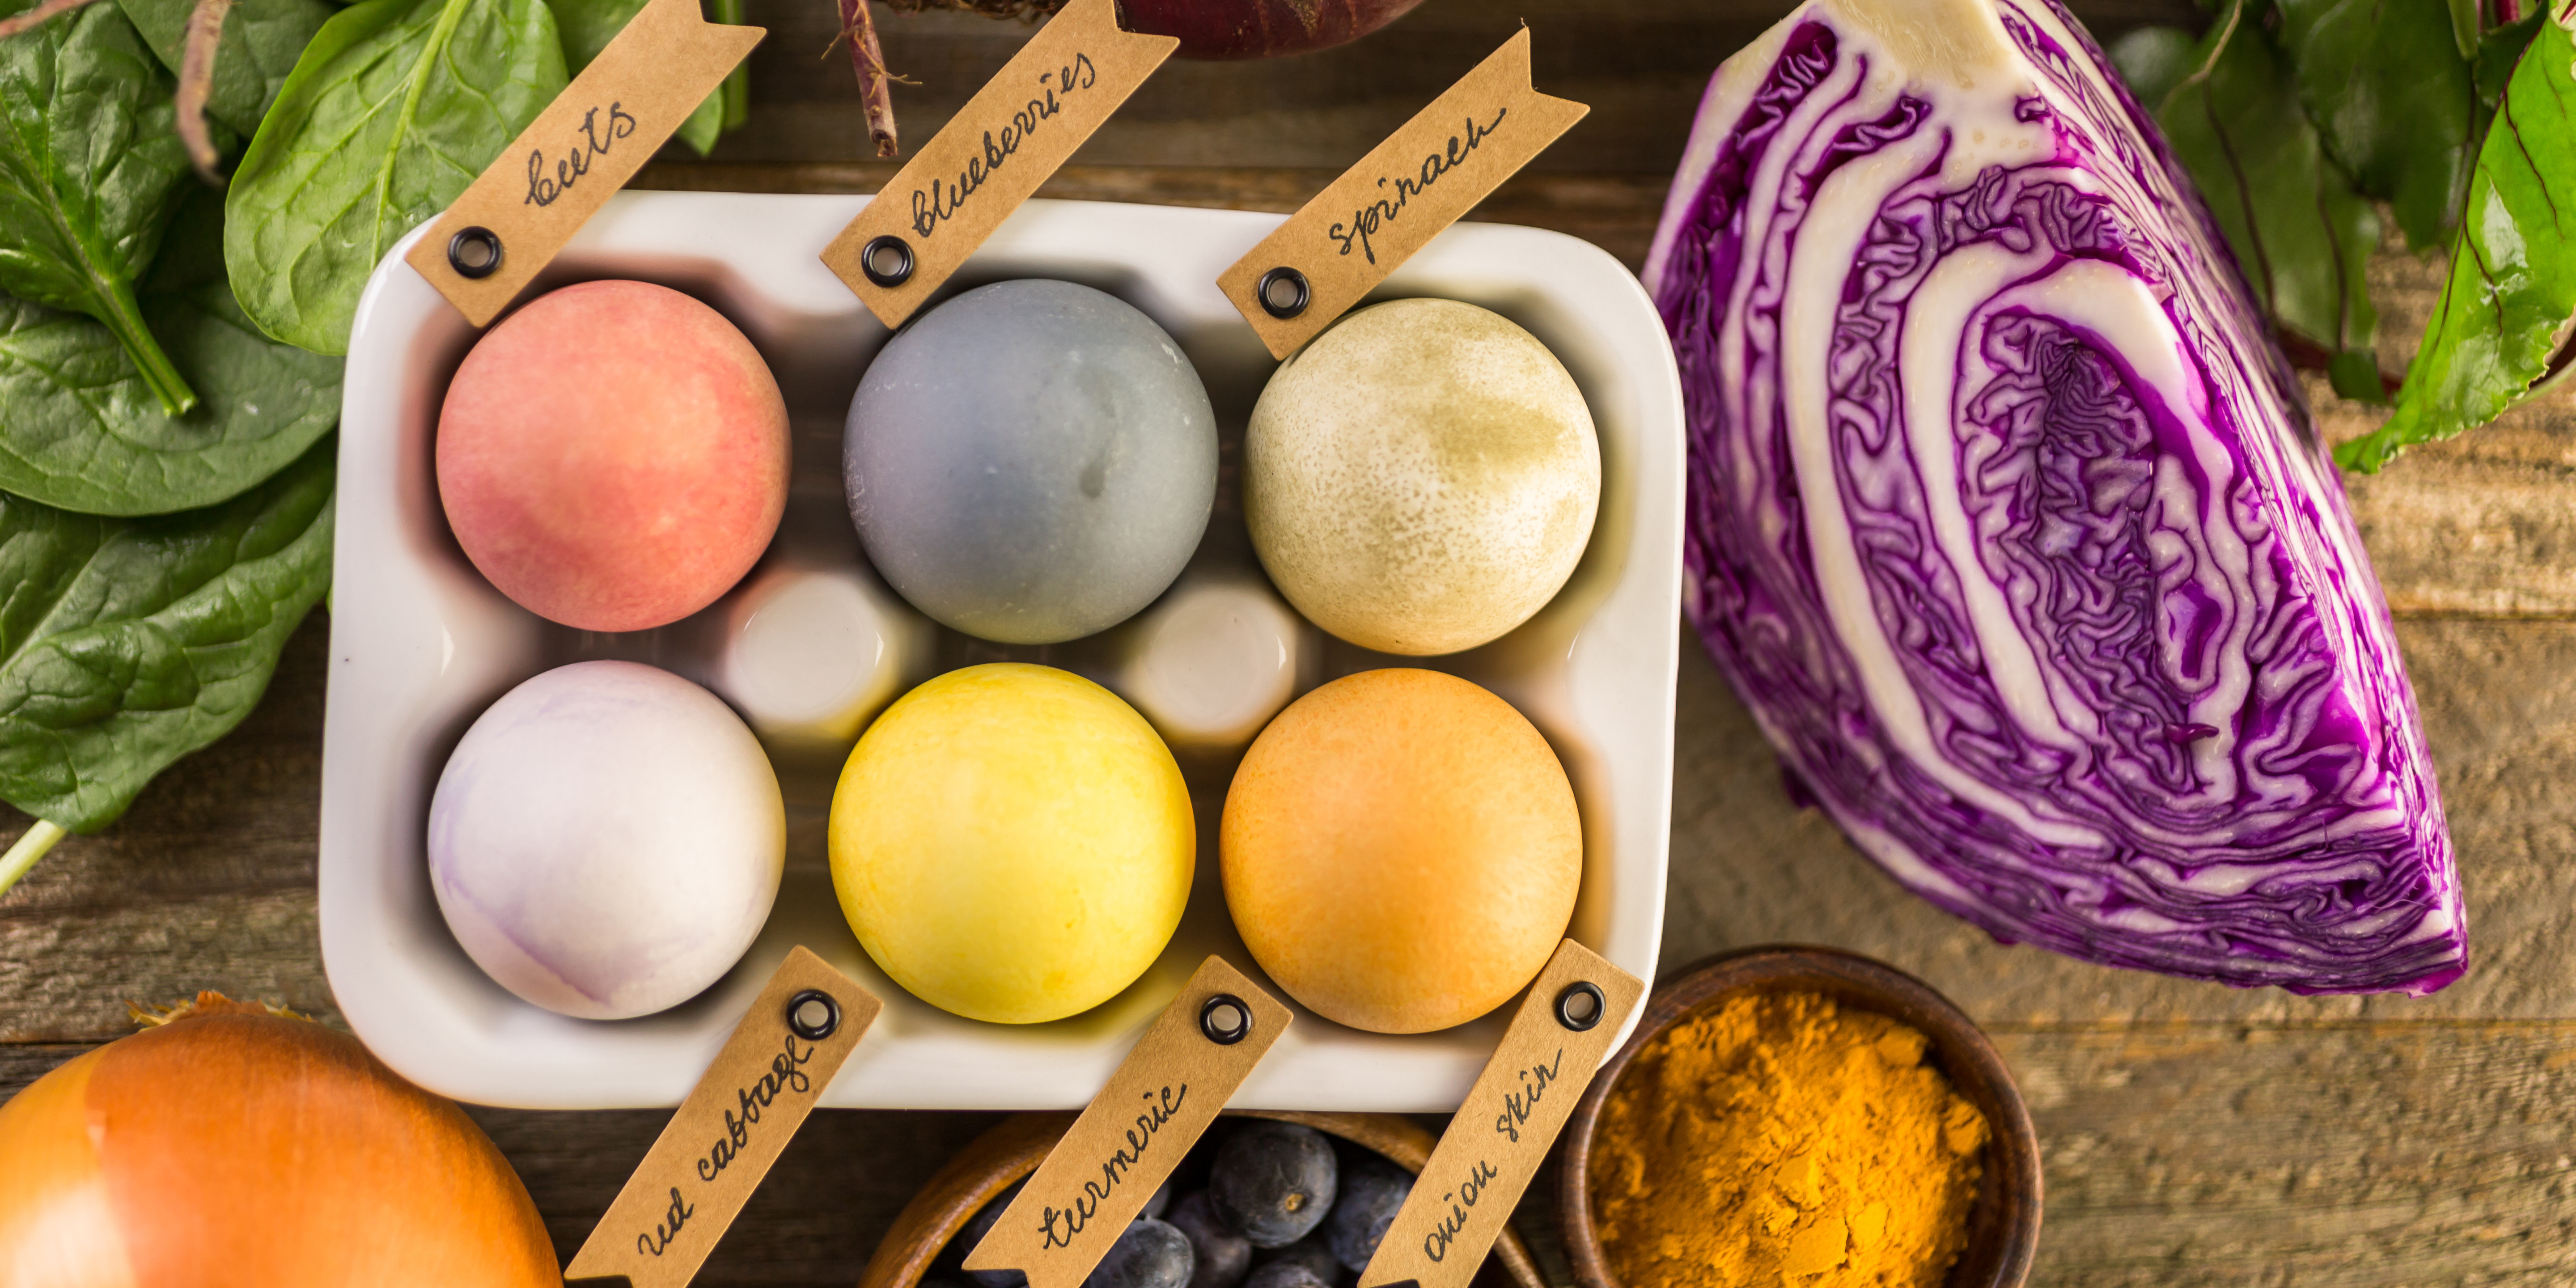
- Beets make a lovely range of pinks and reds. They can stain, so be prepared for messy hands and surfaces — but the results are worth it!
- Blueberries can provide lovely blues and grays. If you have some blueberries that are just past their prime, this may be the perfect solution to use them up.
- Spinach will make your eggs turn a beautiful, earthy greenish brown. And once you let your kids play with their food dyeing eggs, you may even be able to get them to enjoy eating spinach, too!
- Purple cabbage is one of the most beautiful and affordable ways to dye your Easter eggs. Using only about a quarter of a cabbage can yield some wonderful results and give you highly saturated purples.
- Turmeric can create vibrant yellows and golds. You can use fresh turmeric, but you’ll need a lot of it to create rich colors. So feel free to raid your spice cabinet and use dried, powdered turmeric.
- Onion peels are surprisingly full of pigment, and a great way to use non-edible parts of vegetables almost everyone has in their pantry already. Use onion peels to dye your eggs hues of deep orange.
How to Make Natural Dye at Home
Step‑by‑Step Instructions
- Prepare your ingredients
Roughly chop or leave whole depending on size and place in a pot. - Add water and heat
Cover ingredients with water and bring to a gentle boil. Let simmer for at least 30 minutes or until the color reaches the shade you like. - Strain your dye
Remove solid materials with a strainer, keeping the colorful liquid. - Add vinegar and salt
For every quart of dye, add 1 tablespoon of vinegar and 1 tablespoon of salt. This helps the color stick to the eggshells. - Soak your eggs
Submerge hard‑boiled eggs in the dye for a few minutes or several hours depending on how deep you want the color. - Dry and display
Use a spoon to remove the eggs and let them air dry on a rack.
- Prepare your ingredients
Getting Creative: Natural Impressions and Designs
If you want to take your natural egg dyeing to the next level, try creating patterns and plant impressions:
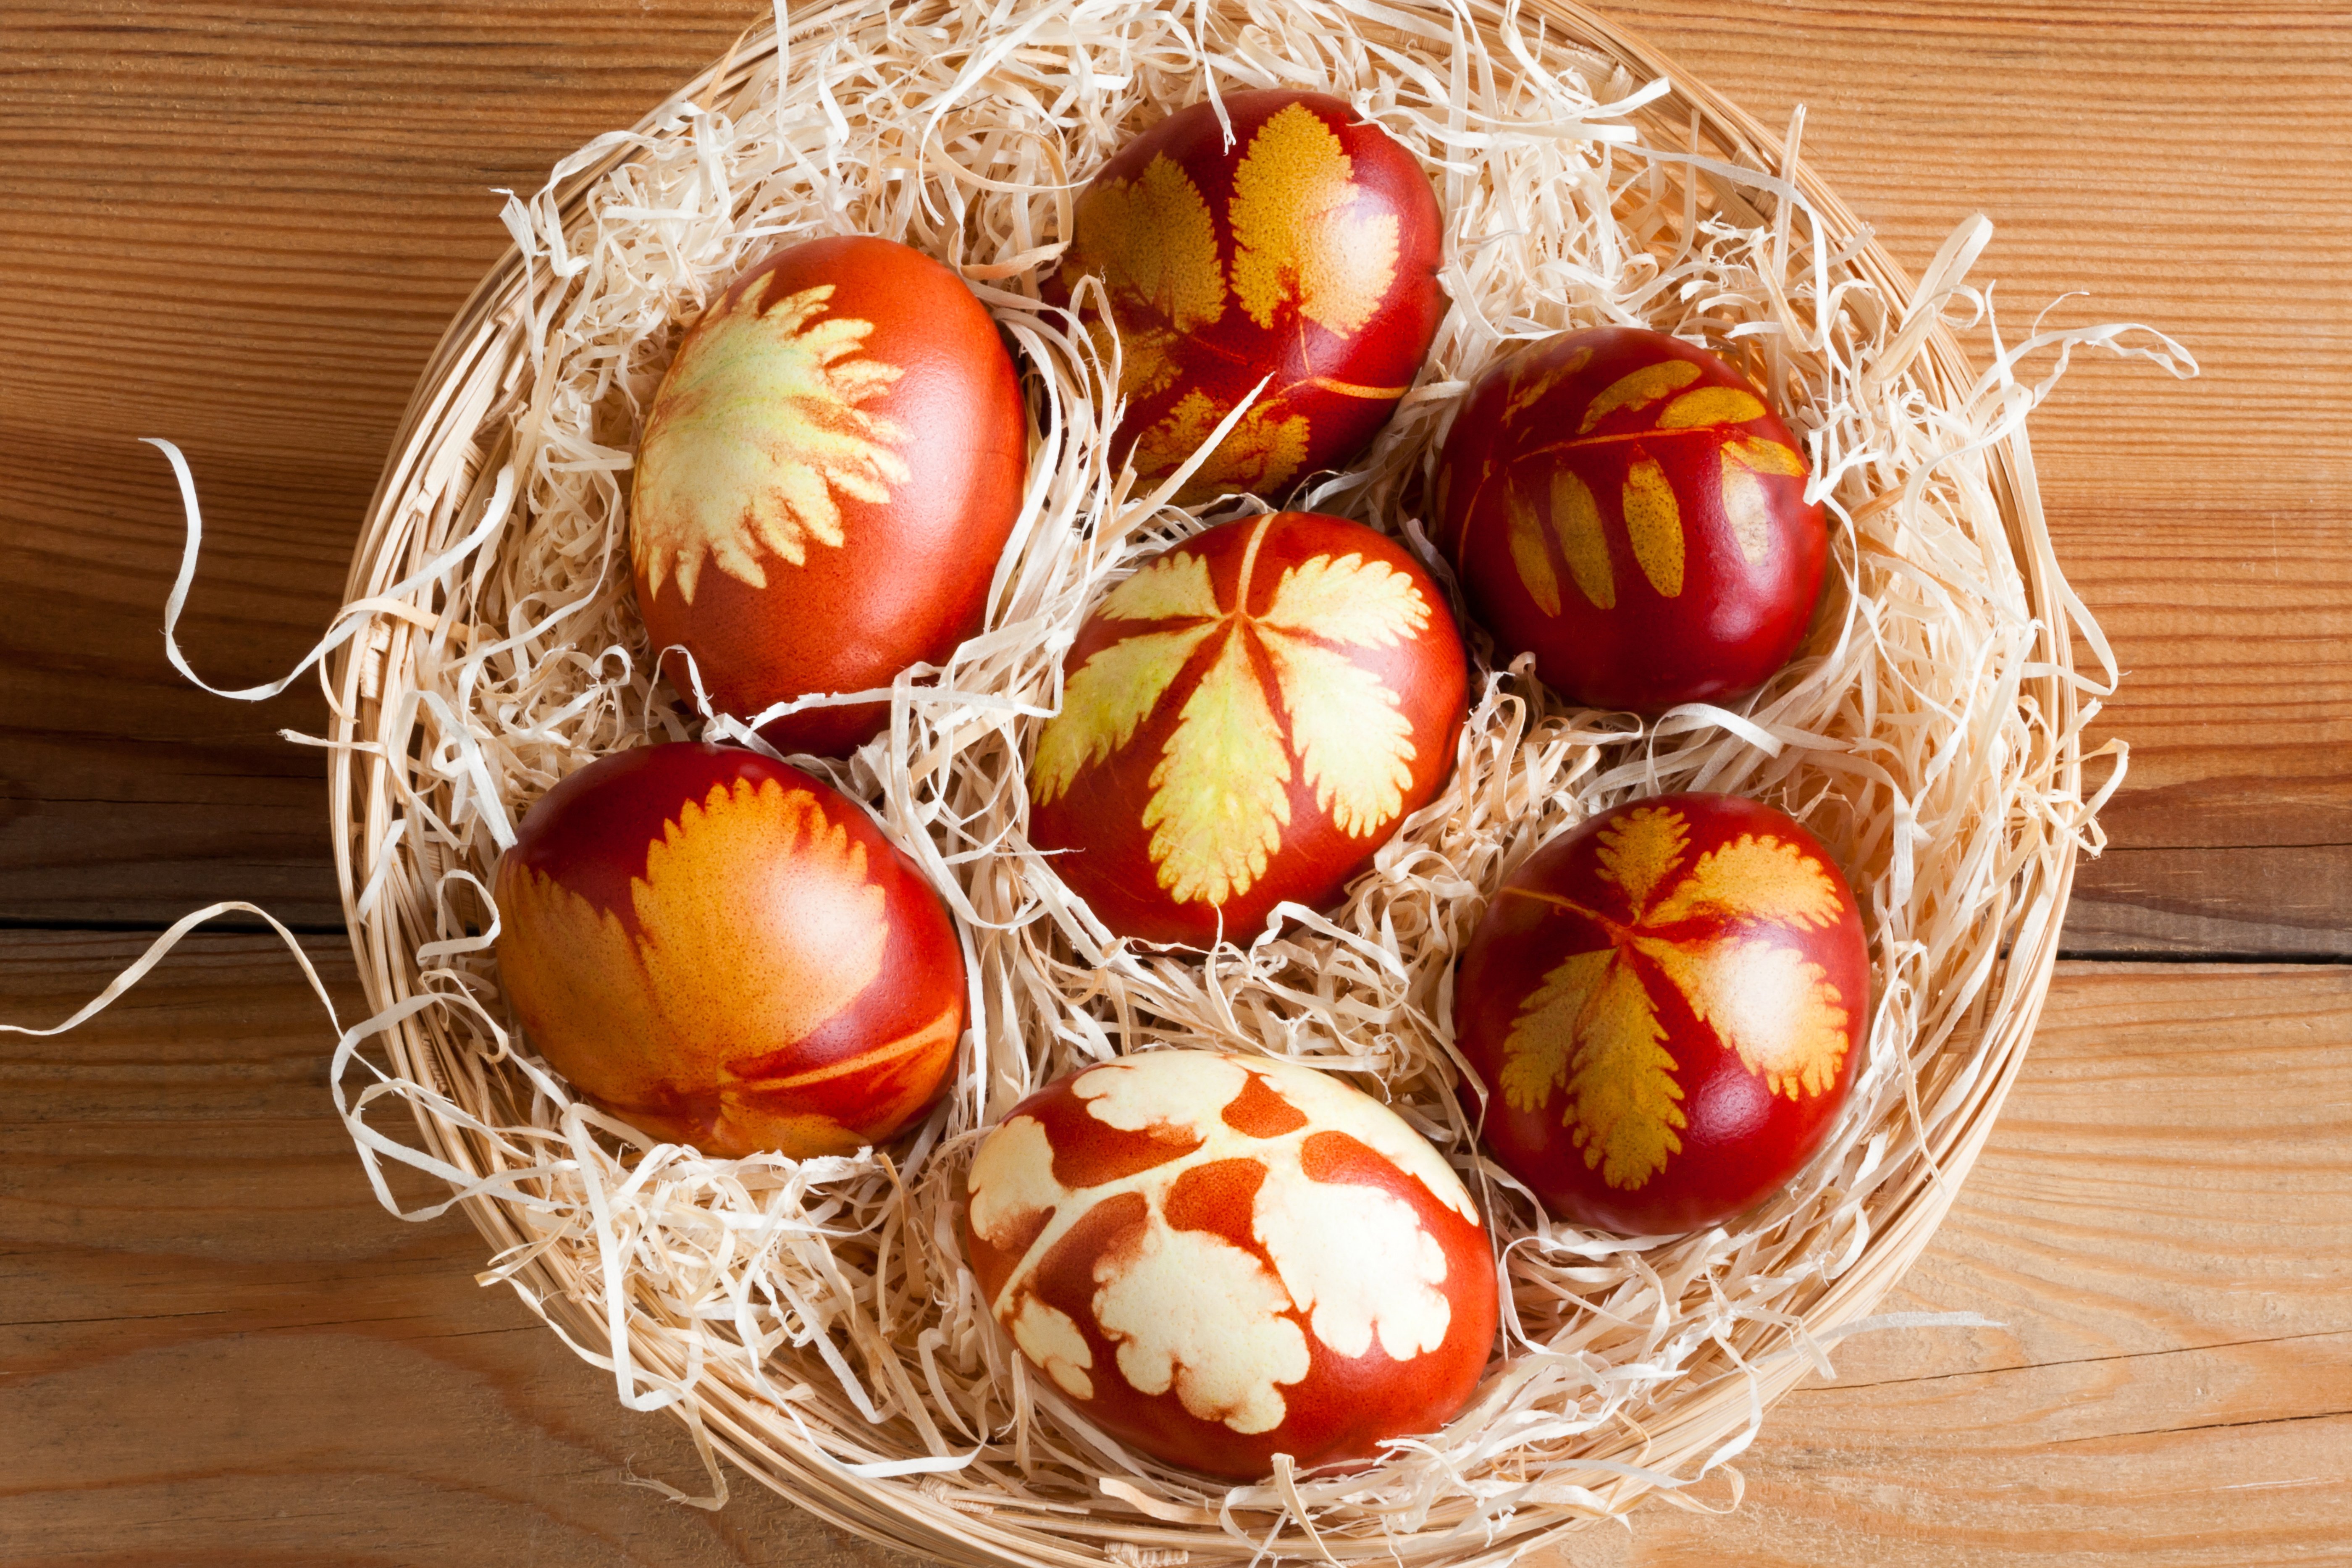
Plant Imprint Technique
- Arrange small leaves, flowers, or herbs on the surface of the raw egg.
- Wrap the egg tightly with cloth or old stockings to hold pieces in place.
- Simmer the wrapped egg in your natural dye 8‑10 minutes.
- Turn off the heat and let the eggs soak for several hours or overnight.
- Carefully unwrap to reveal botanical impressions.
Safety Tips for Natural Dyeing with Kids
- Always use hard‑boiled eggs for dyeing.
- Protect surfaces with newspaper or reusable mats.
- Wear old clothes or aprons for little helpers.
- Let kids help with safe tasks like choosing ingredients and pouring dye once cooled.
Natural Easter egg dyeing is a fun, affordable, and educational way to usher in spring. Using ingredients like beets, blueberries, purple cabbage, and turmeric not only produces beautiful colors but also turns the activity into a learning moment. Whether you keep it simple or experiment with botanical prints and patterns, this tradition is a great way to connect with your kids and celebrate the season.
And don't forget to subscribe to The Holiday Blog for more ways to make the holidays special with the ones you love, all year long!


.png?width=352&name=Blog%20Photos%20(7).png)